The answer to this question is yes and no.
A PSX: Direct Drive technically starts at a hole size range of 9:00 – 9.20” (229 – 234mm), but our 8QRS PSX: Direct Drive does work in an 8” hole.
The 8QRS is manufactured to make the installation of small diameter pipes into manholes a simpler process.
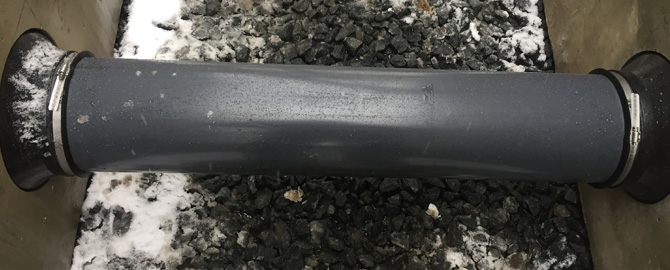
It can be adapted to 1-1/2” to 4” (38 – 100mm) PVC pipes either in the plant or in the field and the power sleeve means it adjusts to almost any 8” hole.
Let’s take a quick look at a simplified version of our selection guide or you can download the full PDF guide here as well.
| PIPE O.D. INCH | PIPE O.D. mm | PIPE DESCRIPTION | HOLE SIZE RANGE INCH | HOLE SIZE RANGE mm | PSX: DD SIZE DESIGNATION |
|---|---|---|---|---|---|
| 1.90 | 48 mm | 1.5" PVC | 8.00 - 8.20 | 203 - 208 mm | 8 QRS "STEP S" PSX |
| 2.38 | 60 mm | 2" PVC | 8 QRS "STEP S" PSX | ||
| 2.50 | 64 mm | 2" CI/DI | 8 QRS "STEP S" PSX | ||
| 2.75 | 70 mm | 2.25" CI/DI | 8 QRS "STEP R" PSX | ||
| 3.50 | 89 mm | 3" PVC | 8 QRS "STEP R" PSX | ||
| 3.96 | 101 mm | 3" CI/DI | 8 QRS "STEP Q" PSX | ||
| 4.21 | 107 mm | 4" (100 mm) PVC D3033 OR D3034 | 8 QRS "STEP Q" PSX | ||
| 4.30 | 109 mm | 4" (100 mm) TRUSS | 8 QRS "STEP Q" PSX | ||
| 4.80 | 122 mm | 4" (100 CI/DI) 4" (100 mm) C900 PVC | 8 QRS "STEP Q" PSX | ||
| 6.275 | 159 mm | 6" (150 mm) PVC D3033 OR D3034 | 9.00 - 9.20 | 229 - 234 mm | 9-06 PSX: DD |
| 10.00 - 10.20 | 254 - 259 mm | 10-06 PSX: DD | |||
| 10.50 - 10.70 | 267 - 272 mm | 10.5-06 PSX: DD | |||
| 11.00 - 11.20 | 279 - 284 mm | 11-06 PSX: DD | |||
| 12.00 - 12.20 | 305 - 310 mm | 12-06 PSX: DD | |||
| 12Y PSX: DD |
How Difficult is the PSX: Direct Drive 8QRS to Install?
As with the PSX: Direct Drive, the 8QRS is simply installed outside of the manhole with our patented power sleeve and then the pipe is tightened to the connector with our take up clamps.
- Prepare the hole to receive the gasket
- Clean the hole of any debris or loose dirt
- Examine the hole for any imperfections (bug holes) and wire ends in the gasket bearing surface
- Patch any voids (bug holes) with slurry
- Remove any wire protruding up into the hole and patch with slurry if needed
- Select the correct PSX: Direct Drive wrench. The wrenches and the adjusters are sized so that only the correct wrench can be used with each size adjuster, and will provide the correct torque. DO NOT USE ANY OTHER SIZE OR TYPE OF WRENCH TO INSTALL PSX: DIRECT DRIVE.
- Place the PSX: Direct Drive Connector in the hole with the adjuster mechanism in position so that it will be at the top of the hole (9 to 3 o’clock) in the final installed position of the manhole. Align the connector so that it is square to top of the hole (9 to 3 o’clock) in the final installed position of the manhole. Align the Connector so that it is square to the hole.
- Place the wrench on the adjuster nut so that the arm of the wrench is on the installer’s left side. This will ensure that the proper orientation is maintained.
- Begin to tighten the PSX:Direct Drive Connector by pulling the wrench handle toward the outside of the manhole. The wrench will ratchet back easily at the end of the stroke. If the connector has multiple adjusters (28” (711 mm) and higher), tighten each adjuster five times, alternating them in sequence so that installation pressure is evenly distributed.
- Continue tightening until proper torque is reached. The wrench will signal this by “breaking” slightly. If in doubt torque has been reached, tighten again and wrench should “break” quickly and easily. If there are multiple adjusters, make sure that the wrench “breaks” at each one. Installation is now complete.


